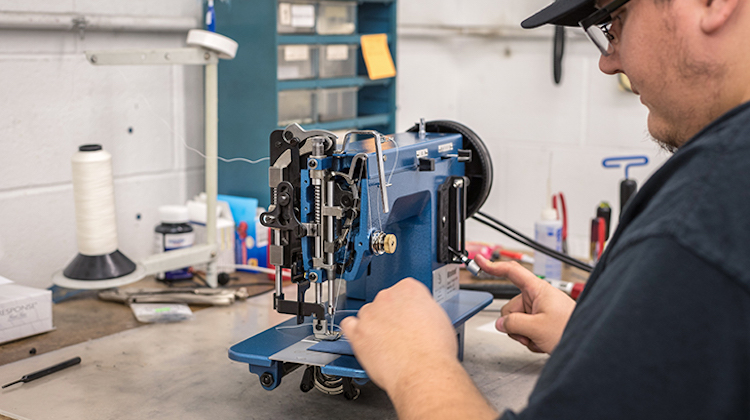
There’s nothing more annoying than sitting down to begin stitching, only to have your sewing machine act janky.
Fortunately, if you’re operating a quality and well maintained sewing machine, the issue is likely minor and can be resolved with a quick diagnosis and repair.
For cases like this, we like to consult the below “Sewing Machine Troubleshooting Guide” that Auto Trim & Restyling News published in March of 2006.
Sewing Machine Troubleshooting Guide
While doing cut-and-sew work, problems of all kinds can crop up.
Equipment-related problems can waste valuable time in the shop, so the trimmer who knows how to deal with them quickly can make the difference between a late job and one right on schedule.
This section contains abbreviated troubleshooting information, which can help with determining and removing problems that crop up in sewing machines.
Needle Breakage
- Needle is loose in clamp — tight clamp screw.
- Needle of incorrect class and variety is being used — compare needle with one of correct type.
- Presser foot is loose or out of line — straighten and tighten it.
- Needle is too light for the fabric — select the correct needle.
- Operator is pulling in fabric — DO NOT assist machine in feeding material.
Needle/Thread Breakage
- Thread is too heavy for the needle — insert thicker needle.
- Right-twist thread is being used — ONLY LEFT-TWIST thread must be employed.
- Damp or defective thread is being used — use dry, smooth thread.
- Machine is incorrectly threaded — follow threading diagram for the specific machine involved.
- Needle is incorrectly set — set the needle with the short groove closest to the loop taker.
- Upper tension is too tight — adjust for correct stitch balance.
- Thread take-up — spring is out of adjustment.
- There is a sharp edge on the rotating loop taker, bobbin case, or tension controller — smooth with the finest emery cloth (320 grit) or oilstone and polish with cloth.
- Needle is rubbing against presser foot — adjust and tighten the foot.
- Needle is defective, blunted, or bent at the point — use a new needle.
- Needle hole in feed dog is sharp-edged or burred — smooth the offending area.
Bobbin/Thread Breakage
- Defective or damp thread is being used — use dry thread of the correct size.
- Bobbin case tension is too tight — adjust to obtain well-balanced stitches as described under “Needle/Thread Breakage.”
- Bobbin case is incorrectly threaded.
- Bobbin is wound too much to revolve freely — remove thread until it is below rim of the bobbin winder to avoid winding the bobbin with an excess of thread.
- Rounds of thread on the bobbin are lapped over one another — unwind bobbin manually and rewind evenly and uniformly.
- Bobbin case is sticky with gummy oil and/or lint — clean the bobbin case and rotating loop taker with kerosene or naphtha and lubricate the rotating loop taker with a few drops of oil.
- There is a sharp edge on the rotating loop taker, bobbin case, bobbin, or needle — smoothen same as per in the beginning of the article.
- Bobbin sides may be bent, and bobbin will not turn freely — bobbins should be replaced.
Skipping Stitches
If the needle thread fails to catch the bobbin thread, the machine will not sew or will skip stitches. To remedy this problem, time the needle with the needle bar.
Drawing of Seam
If the threads draw or pucker the seam, adjust the tensions.
Stitches uneven or Stitches Piled Up
If the stitches pile up, adjust the stitch length regulator for a longer stitch. Also, if indicated, the presser foot pressure on the material should be increased. Check the rise of the feed dog teeth above the surface of the needle plate — they should rise to their full length.
Feed Dog Striking Throat Plate
If the feed dog strikes the throat plate, adjust the feed dog to rise above the throat plate no more than the length of the feed dog teeth.
Also, check the travel of the feed dog within its slots in the throat plate. With the machine set for the longest stitch, observe whether the feed dog strikes either the front or the rear of the feed dog slots in the throat plate. The simplest remedy for this problem is a slight reduction in stitch length to avoid such striking.
There is also the possibility of an accumulation of lint and debris between the feed dog and the underside of the throat plate. Remove the throat plate from the machine bed by loosening its screws, and brush any foreign matter out from the feed dog, which may have become packed into its slots and between its teeth. Also, clean the underside of the throat plate. Replace the throat plate on the machine bed; tighten its screws.
All sewing machines need maintenance. But if you buy a high-quality one, you won’t spend a lot of time and money constantly repairing it. We use NC Sewing Machines, and recommend you do too. They’re built tough and sew great! You won’t find a more reliable machine.
left twist thread…. Ok so when would i even get the wrong twist and how do i tell ?? thanks