• Skip to main content
  • Skip to primary sidebar
  • Skip to footer
  • Home
  • About
  • Forum
  • Design Studio
  • Upholstery Jobs
  • Newsletter
  • Sponsors

The Hog Ring

Auto Upholstery Community

  • Facebook
  • Instagram
  • Twitter

How to Bind an Isolated Hole in Carpet

January 3, 2020 By Nadeem Muaddi 12 Comments

The Hog RIng - How to Bind an Isolated Hole in Carpet

Want to learn how to bind an isolated hole in a vehicle carpet? Check out this step-by-step tutorial by Brent Parker of Brent Parker Motor Trimming in Glenorie, Australia.

“Sometimes it’s nice to not have to put a cut in from the edge of the carpet to bind the hole,” said Brent. “I’m sure a lot of you know how this technique is done, but for the guys who don’t, here’s how it’s done.”

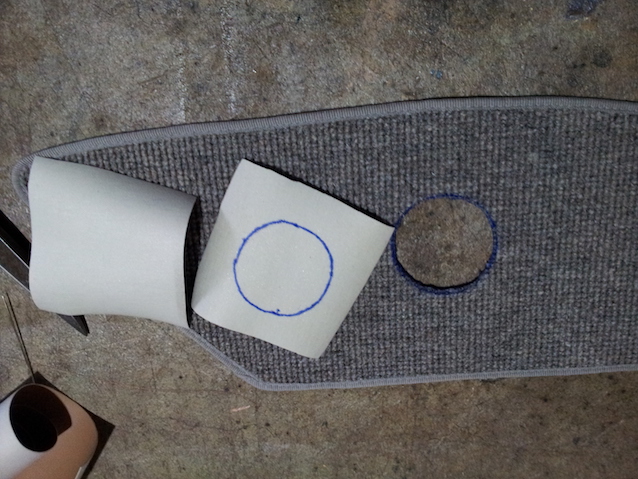
1. Cut your carpet and binding material

Cut the hole you require in the vehicle carpet. Be careful that it’s the correct size and location. Otherwise, you could ruin the project.

Next, cut two square pieces of material about an inch bigger than the hole. I’m using some cheap vinyl to illustrate.

The Hog Ring - How to bind a carpet hole

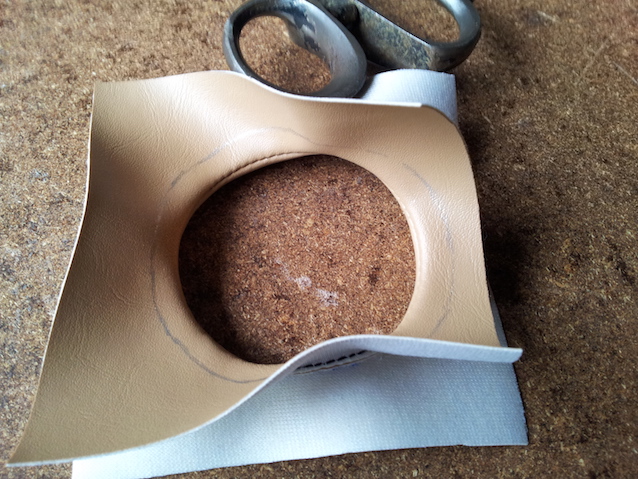
2. Trace the hole on your binding material

Put one piece of vinyl underneath the carpet face-down and trace the hole.

The Hog Ring - How to bind a carpet hole

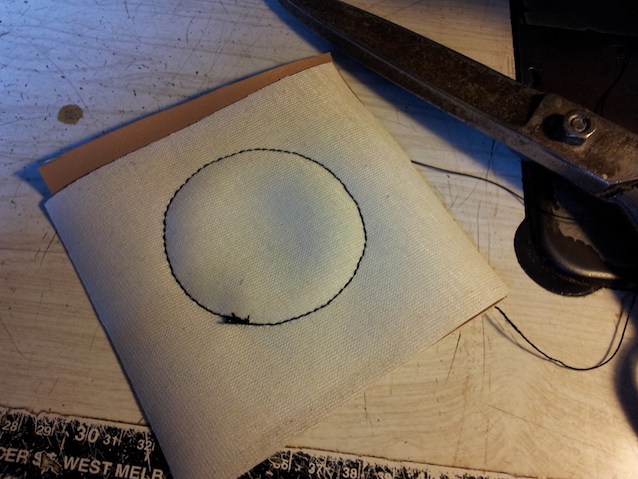
3. Sew the binding material

Place the two pieces of vinyl together with their faces touching, and the marked one on top.

Sew the two pieces together following the shape of the hole you traced. Be sure to use a small stitch length.
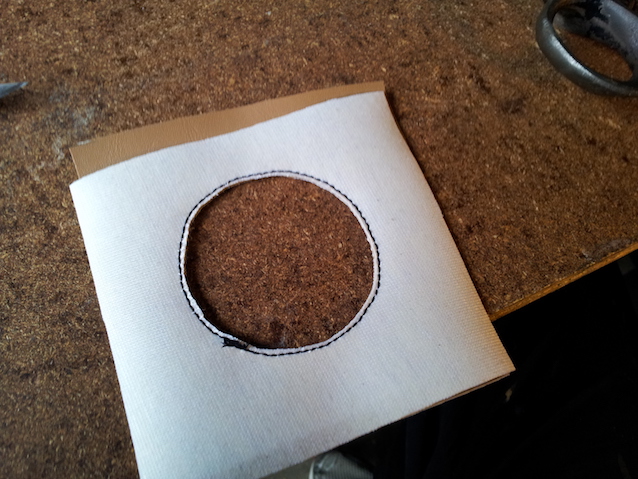
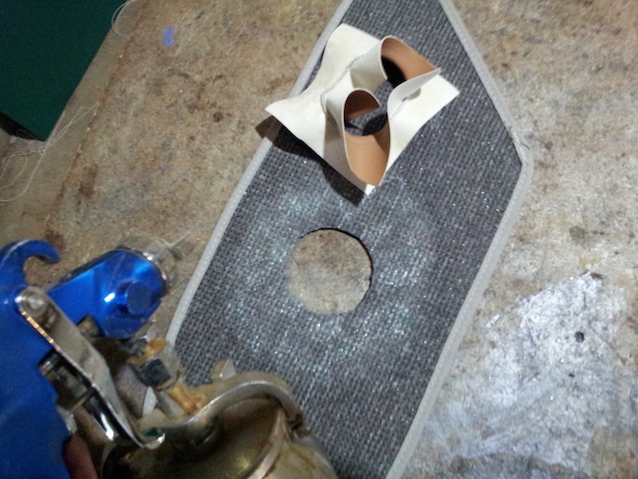
The Hog Ring - How to bind a carpet hole

The Hog Ring - How to bind a carpet hole

4. Cut out the hole

Cut out the inside of the circle, keeping close to the stitches.

The Hog Ring - How to bind a carpet hole

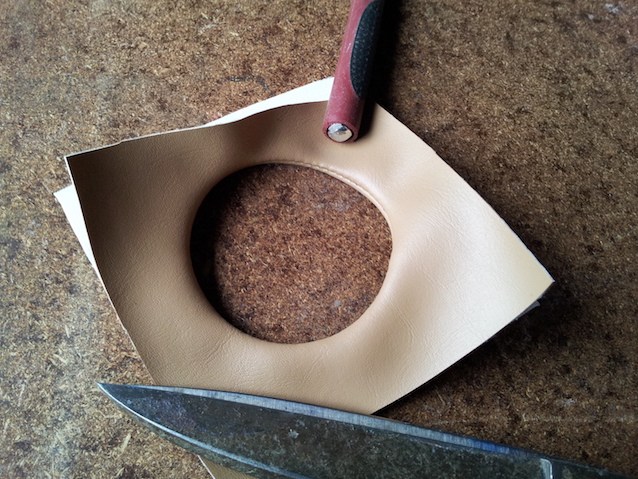
5. Flip the binding material inside-out

After you cut the hole, turn the vinyl the way it’s meant to be — face out, with the seam on the inside of the circle.
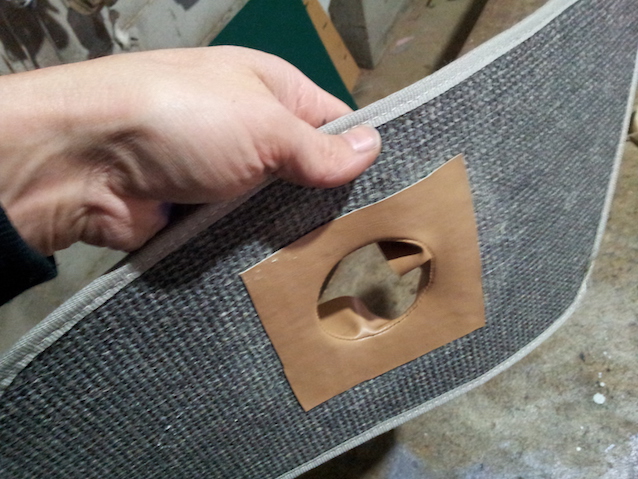
The Hog Ring - How to bind a carpet hole

6. Mark the circle

Using a vinyl pen or chinagraph, mark the circle where you will stitch the binding to the carpet.

The Hog Ring - How to bind a carpet hole

7. Glue the binding material to the carpet

Glue one side of the vinyl binding material and the backside of the carpet together.

The Hog Ring - How to bind a carpet hole

Make sure that the stitches are touching the carpet so that it’s even all around.

The Hog Ring - How to bind a carpet hole

Turn over the carpet and pull the binding through the other side.

The Hog Ring - How to bind a carpet hole

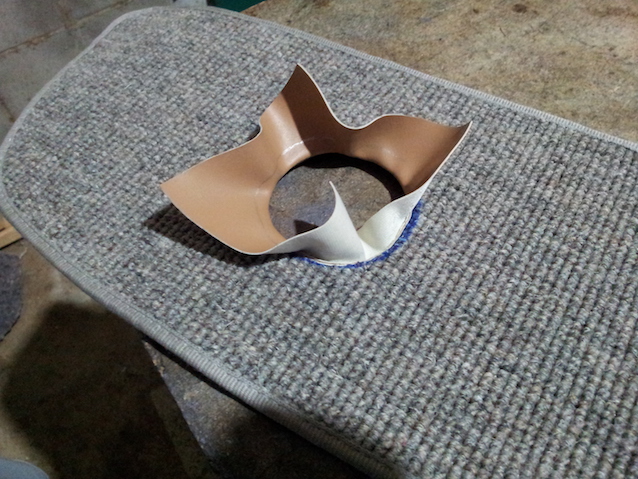
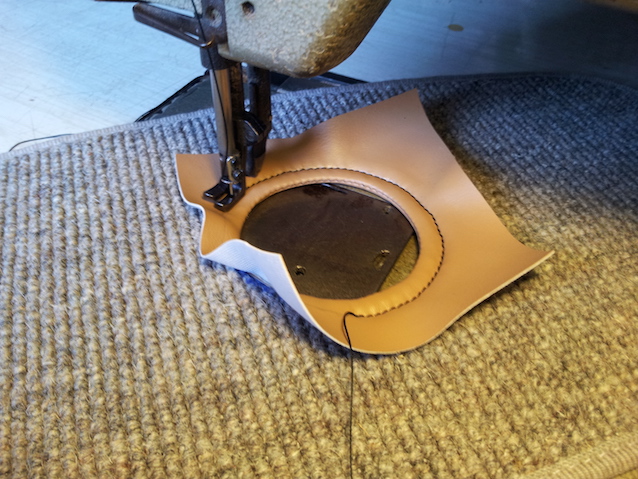
8. Sew the binding material to the carpet

You’re almost finished! Take the carpet to the sewing machine, make sure you give it tension, and start sewing on the line you marked slowly and carefully —  tensioning as you sew because you want it even all around.

The Hog Ring - How to bind a carpet hole

The Hog Ring - How to bind a carpet hole

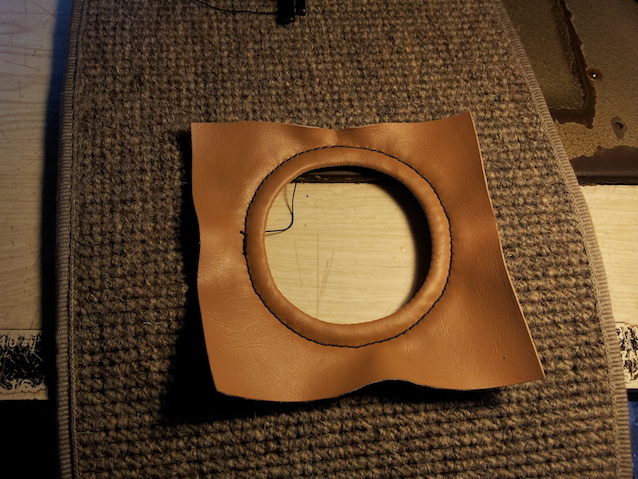
9. Trim the binding material

Lastly, trim the excess material off your binding, staying close to the stitches. Be careful to keep it even.

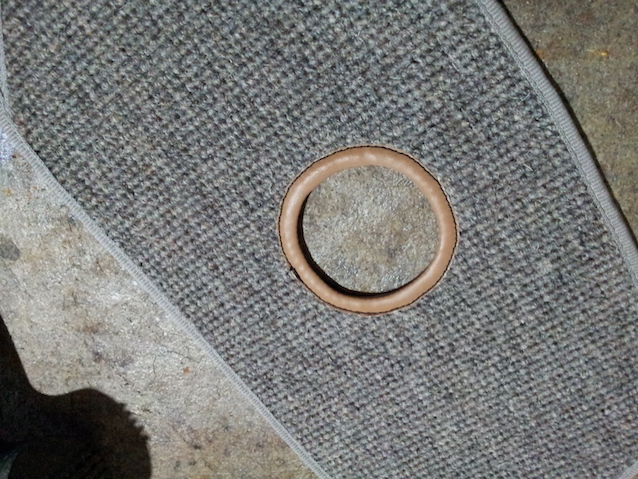
Here’s the finished product:

The Hog Ring - How to bind a carpet hole

To see more of Brent Parker Motor Trimming’s work, follow them on Instagram and Facebook. Also, check out The Hog Ring’s “How To” section.

Filed Under: Archive, How-to, Pro Tips, THR Favorites Tagged With: Auto Trim, Auto Upholstery, Brent Parker Motor Trimming, Car Interior, Carpet, Carpet Binder

Reader Interactions

Comments

  1. McHenrys says

    August 21, 2017 at 10:17 am

    Only thing is a sharpie should never be used on vinyl

    Reply
    • Kevin Balser says

      July 13, 2021 at 1:04 am

      AMEN !!

      Reply
  2. plunge pools says

    October 16, 2018 at 9:58 am

    Amazing!

    Reply
  3. Guy Galipeau says

    May 23, 2019 at 5:39 pm

    what a great idea– thank you for sharing. – I’ve been looking for a way

    Reply
  4. Brent Parker says

    July 5, 2019 at 8:01 pm

    It was simply a scrap piece to show how its done.

    Reply
    • Oliver Reiff says

      January 6, 2020 at 4:55 am

      ♥️✌️much thanks & appreciation for the tips n tricks!

      Reply
  5. James Ayres says

    January 3, 2020 at 1:44 pm

    Two points, no need to back stitch on the start as you’ll connect on the circle, and you don’t need to use a single foot.

    Reply
  6. William says

    January 3, 2020 at 4:09 pm

    This method works for leather as well but I should warn you to take care of unfinished edges on vinyl because over the years it can fray. One of the ways to protect the vinyl from fraying is to imagine at least a half inch larger than the finished edge and making relief “V” notch cuts all the way around the circle. Glue the entire back side of the top vinyl piece wait for the glue to dry then turn all your edges under, then sew it down about an eighth of an inch from the edges. Leather is different where all you have to do is burnish the edges to keep it clean looking.

    Reply
  7. Bob morgan says

    January 4, 2020 at 3:27 pm

    Brent – “Thank you” for taking the time to share this. Always enjoy learning from the masters!

    Reply
  8. Jack Davis says

    April 17, 2020 at 11:58 am

    My father taught me years ago I have done lots of. Them I use leather instead of vinyl you don’t have to worry about edge fraying,

    Reply
  9. Nickson says

    October 25, 2020 at 7:47 am

    Waaaaaaaaaaaal thank you would love to learn more. Very straight forward tutorial keep it up

    Reply
  10. Johnny Ritcheson says

    February 9, 2022 at 7:48 am

    thank you! I struggle no more !!! LOL

    Reply

Leave a Reply Cancel reply

Your email address will not be published. Required fields are marked *

Primary Sidebar

THR Sponsors

NC Sewing Machines
Miami Corporation RIght Rail - Ad 2
Top Down Group
Apex Leather
  • Albright's Supply
  • Keyston Bros
  • Moore & Giles Ad 1
  • GAHH Automotive
  • Douglass Interior Products
  • Hyde Leather
  • Premium Auto Fabrics

THR Favorites

The Hog Ring - 10 Tips to Organize Your Own Car Show 1

10 Tips to Organize Your Own Car Show

Spring is around the corner – which means car … [more] about 10 Tips to Organize Your Own Car Show

Auto Upholstery - The Hog Ring - Classic Volkswagen Beetle Door Panel

Design Studio: VW Beetle Door Panel

Last month, we introduced two illustrations … [more] about Design Studio: VW Beetle Door Panel

Auto Upholstery - The Hog Ring - Ford Mustang Design Studio

Design Studio: 1964-66 Mustang Door Panel

If you’re a big fan of The Hog Ring Design … [more] about Design Studio: 1964-66 Mustang Door Panel

Auto Upholstery - The Hog Ring - Ish Jimenez - West Coast Customs

Talking Shop with Trimmer Ish Jimenez 3

The third and final installment of our … [more] about Talking Shop with Trimmer Ish Jimenez 3

Auto Upholstery - The Hog Ring - Gottfried Upholstery - Dragon Scale Pleats

Gottfried’s 3D Dragon Scale Pleats

Since Vilner introduced dragon scale pleats … [more] about Gottfried’s 3D Dragon Scale Pleats

Auto Upholstery - The Hog Ring - Airbag Tag

Sewing Airbag Seams with Durkopp Adler

For good reason, many auto upholstery shops … [more] about Sewing Airbag Seams with Durkopp Adler

Categories

Footer

Recent Articles

  • The Genesis GV60 has a Crystal Sphere on its Console
  • Mississippi Auto Trim Shop Destroyed in Fire
  • Find a Job in Auto Upholstery
  • There’s a New Bitchin Stitchin Class for Building Consoles
  • Enter to Win Hydes Leather Build of the Month!

Recent Comments

  • Izet on Find a Job in Auto Upholstery
  • Janice Lamp on Impacted by Coronavirus? Apply for a Forgivable Loan
  • markspencer on 2019 SEMA Show Hosts Student Career Day
  • Jerome on Convertible Tops in Any Color You Want!
  • Christopher Collins on Custom Dashboards Made to Order

Advertise With Us!

We're always looking for companies to collaborate with. Watch this short video about the benefits of sponsorship and then email us to say hi.
anal porno bangbros rus porno yaşlı porno konulu porno olgun porno porno izle sarışın porno bakire sex 69 porno

Copyright © 2023 · Magazine Pro On Genesis Framework · WordPress · Log in